Sunday, July 28, 2013
Inspirational Sundays: Acts Of Kindness
Inspirational Sundays: Acts Of Kindness
2013-07-28T00:00:00-04:00
Jennifer
Inspirational Sundays|
Comments
Labels:
Inspirational Sundays
Thursday, July 25, 2013
Sunday, July 21, 2013
Inspirational Sundays: Creative Adult
Inspirational Sundays: Creative Adult
2013-07-21T00:00:00-04:00
Jennifer
Inspirational Sundays|
Comments
Labels:
Inspirational Sundays
Tuesday, July 16, 2013
Starry Posey
I just love the ethereal colors in this one. It reminds me of night time in a fairy hollow somewhere. :o)
Labels:
Color Stories
Sunday, July 14, 2013
Thursday, July 11, 2013
Do You Tip Fairly?
Tipping the people who take care of us in the service industry is an important part of our everyday lives but some of us are a little foggy on whom, how much, and when we should be tipping. Now, as a former server and hairdresser as well as a frequent customer/client, I have experience with both sides of this first hand. Where I live, in Michigan and from what I've read about everywhere else in the U.S., the standard tipping rate for a server is 20% of your bill. If you are lucky you will occasionally get that really nice generous table who actually tips this much or more but more often than not, you're lucky to get 10%. Then there are the dreaded tables who will run you ragged meeting their every whim but they leave you zilch. I always loved those tables. Can you sense my sarcasm? :o)
Of course you have to take into account the quality of service being provided by your server but you must also remember that servers make just over $2 an hour without tips as per the adjusted minimum wage for their industry and most of that is eaten up from having their tips taxed. So essentially, they live off of their tips exclusively. It amazes me that that is even legal but it is. I have also found myself wondering why servers have to rely on an establishments patrons to pay their wage for the most part but that's a whole other topic! (Here's an interesting article on the subject for those of you who may have an interest. http://yhoo.it/1akMRbI ) It occurs to me however that maybe not everyone is aware of the 20% rule. I know that 10 or 15 years ago, 10% was considered standard. Therefore, I have comprised a list of standard tipping rates for those situations where you are not quite sure of the appropriate amount to leave.

What do you all think about the tipping standards? Do you think it is fair that you are expected to pay for not only the services and goods you receive but also be expected to tip the staff generously as well? Let me know your thoughts and feelings on this.

Tuesday, July 9, 2013
How To Make A Custom Signature
MAKING THE SIGNATURE
Okay, so first things first. You need to create your signature. I used MyLiveSignature to make mine. Click: START NOW>> SIGNATURE CREATION WIZARD>> type in your name then click: NEXT STEP>> You then can choose from 120 different fonts then click: NEXT STEP>> Choose the size you would like your signature then click NEXT STEP>> Choose your colors then click: NEXT STEP>> Choose if you would like a slope. If you don't want a slope, just choose the first option they have available and it will be straight. Click: NEXT STEP>> Alright, from here you just hover over your finished signature, right-click and SAVE IMAGE AS. If you need the HTML code for any reason, just scroll down and click: WANT TO USE THIS SIGNATURE? This is what mine looked like when I finished this step.Monday, July 8, 2013
Angel Strawberry Shortcake Recipe
I love strawberry shortcake but as you can tell from the picture below, I have a little twist on my version. I use angel food cake instead of shortcake biscuits. I love my version because there is something about the sweet lightness and spongy texture of the angel food cake combined with the fresh sweetness of the strawberries that makes it just amazing! Add a little whipped cream on top (I use Cool Whip) and you have the perfect dessert for Summer. So good!
The strawberry topping for this dessert is pretty straight forward. Stem and quarter approximately 2 quarts of fresh strawberries and combine with approximately 2/3 Cup of white sugar in a bowl. I say approximately because it really depends on how much topping you want to make and how sweet you like your strawberry mixture. I like a little sweeter taste so I add a little more sugar. Cover and chill in the fridge until you are ready to serve.
As I said I like to use angel food cake. Here is the recipe I used and really enjoyed!
As I said I like to use angel food cake. Here is the recipe I used and really enjoyed!
Ingredients
- 1-1/4 cups egg whites (about 9)
- 1-1/2 cups sugar, divided
- 1 cup cake flour
- 1-1/4 teaspoons cream of tartar
- 1 teaspoon vanilla extract
- 1/4 teaspoon almond extract
- 1/4 teaspoon salt
Sunday, July 7, 2013
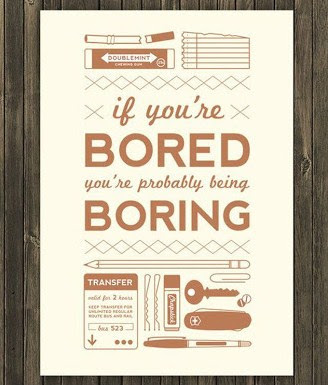
Inspirational Sundays: If You're Bored ....
Inspirational Sundays: If You're Bored ....
2013-07-07T06:00:00-04:00
Jennifer
Inspirational Sundays|
Comments
Labels:
Inspirational Sundays
Wednesday, July 3, 2013
Get Your 4th of July Sales & Deals!!
Look what I found from Julep! It's a deal for a free glittery Julep top coat in Fireworks for the 4th of July and I thought I’d share it. You can get this for FREE with any star-spangled nail purchase, just enter code “FIREWORKS” at checkout. Love this!
As you may know, Bath & Body Works semi-annual sale is going on right now. I have already found my way to the shop in my local mall and stocked up but I just had to pass this deal along. If you love Bath and Body Works 3-wick candles as much as I do, then you are going to love this deal! A bunch of their candles are 1/2 off right now! That means instead of $20.00 you are getting them for $10.00!! (I saw that in some cases it was $11 but most are $10)
 | ||
There's a big sale going on over at The Children's Place as well. They have 50% off already discounted prices plus there is an additional 20% off when you use the coupon code HAPPY4th that is good through July 8th. They have some $4 deals on all sorts of things from t-shirts to pajamas to accessories but then you also get to take an additional 20% off of THAT when you use the coupon code! How awesome is that?

Labels:
Savvy Savings
Monday, July 1, 2013
How To: Make A Blog Button With A Grab Box
125x125
Step 1.) You need to choose a picture and edit it down to the size you want your button to be. I chose 125x125 because that seems to be a pretty standard size. Once you know what the background of your button will be, you can go to various sites to scale it down to the size you want. I like PicMonkey and used this site for the purposes of this tutorial but you could also use Ribbet, or iPiccy, or even Pixlr. With the exception of Pixlr, the other sites have a button to the left of the screen once you upload your picture and go to the edit screen that says resize. Click on that button and change your background to the desired height and width. Note: You may need to crop your picture into a square before resizing so as not to warp the image. If you do decide to use Pixlr, click the advanced edit option then simply upload your photo. Once in the editing screen, go to the top of the screen and under the Edit tab, scroll down to Select Pixels. You can then resize it to your desired height and width and make sure its correct by looking over to the top right side of the screen where it will display the numbers. Once you do that, add all the text and flourishes you think you need to represent your blog.
Step 2.) Upload your soon to be button to a site like Photobucket or Flickr. I used Photobucket. Or even easier still, if you are on Blogger and you want to use a picture that is already on your blog, go to Picasa because that is where blogger hosts all your pictures anyway. You already have an account simply because you use Blogger! Click on your picture and you should see a set of codes off to the right side. Alright, keep that tab open because you are going to need one of those codes. For Picasa, link to this photo off to the right, which will open up a set of codes. You need the first one.
Subscribe to:
Posts (Atom)


